Wednesday, December 16, 2015

Course Reflection

Before this course I guess I didn’t know much about digital media. I had used some Photoshop in courses prior to this, and that was basically the extent of my knowledge. The first thing that I felt was very helpful was that I found out my phone can actually take decent pictures, and there is free software where I can edit the images. I figured I would need a larger more expensive camera to take photos nice enough to use for assignments. Before this course I had little understanding of what an image resolution really is, and this is probably the most valuable lesson to me. I simply figured more pixels is better, which I guess is still true. However it was important to know what resolution your camera has, and how you are able to tell how many pixels it is able to capture. I will never forget that my phone has an 8 mega pixel camera, well until I get a new one :). Figuring out the dpi for prints is still a bit fuzzy in my mind, and I know that is something that I will have to look up once more if I want to print an image. 

Thanks to this blogs and the website I can now embed codes like a champ. When I had to make websites for previous classes I would end up messing it up somehow, like placing the wrong code in the wrong area. If there was a way to screw something up I managed to do it. In the beginning of this course I know I stated somewhere that I was not a tech savvy individual, I didn’t know how to do much of anything on a computer. Now I think I might be able to help someone with their digital assignments. 

Two of the more difficult assignments to me were the video mashups and creating the songs. These projects took me way out of my comfort zone, and were probably the most challenging. It may have been more challenging since I had zero knowledge of this software prior to the assignment. These were things that I know that I was not happy with my results, but I know if I chose to complete these assignments again I would have a much better outcome. The mistakes are there in each assignment, but you don’t learn nearly as much from your successes as you do from your failures. 


You learn something new everyday, and you learn a lot more through an entire semester. 

Larry and Harry

During my communications this term we had a lecture about intellectual property, basically copyrights. An interesting thing we learned was that it is possible for a person to create the same exact version of something, even though it was already created and copyrighted, as the other created might not have known about the work. If the other creator was proven to have no knowledge of the other work, then the money earned for the second already copyrighted work would have to be shared amongst the two. That was neat, and seems nearly impossible for that to happen today with the help of the internet. But the second interesting thing we learned was about a case involving Harry Potter.

This case involved J.K Rowling, the creator of Harry Potter (I would hope everyone knows this) and an author by the name of Nancy Stouffer. Stouffer brought up this case in 2000 claiming that Rowling had stolen the idea of Harry Potter. Stouffer's book was called Larry Potter and His Best Friend Lilly. The characters names were similar, I'll give her that. Also both Harry and Larry wear glasses. The highest form of evidence that Stouffer had was that she claims she had created the term "muggles." During my class the professor stated that Stouffer mainly lost the case because her book was just worse that Harry Potter, so the courts did not rule in her favor. But as I found out on Cracked.com the case ended in a different manor. Stouffer created Larry Potter in 1988, but only found out one mention of his last name being Potter, and the font for "Potter" was written in a text that had not been created until 1993. Stouffer had changed pages far after her book had been created to add the word "muggle."

Maybe this case was common knowledge to most, but hey, I didn't know about it.

Mushrooms? Mushrooms.


If you were lost in the woods in Ohio, and you were at the point of starvation, what do you eat? Well I don't like mushrooms, but I thought thats a common thing that you could eat, right? But you have to know whats edible and whats not. So here is some information I found from my dumb question. 

First of all, there are over 2,000 kinds of wild mushrooms in Ohio. Here are some that are not safe to eat. 


Fly Amanita. This guy is poisonous.  
Destroying Angel mushroom. This one will kill you.
False Morel, yeah, this is poisonous. 
Green-Spored Lepiota. This guy is responsible for the highest amount of mushroom poisonings. 
This wasn't all of the poisonous mushrooms, but there are too many for me to do all of them. Not all mushrooms will kill you or make you ill, but its good to at least be able recognize some of them. Here are some of the mushrooms in Ohio that are safe to eat. 
Shaggy Parasol. Totally edible. 
Morel Mushroom. This guy is definitely safe to eat, just don't confuse it with the False Morel above.
Chicken or Sulfur Mushroom. Safe to eat, also fun to look at. 

Giant Puffball. They can get up to 150 centimeters in diameter. Eat up! 

For some more information on the fungi of Ohio here is a fun link. Enjoy.


Wildlife bridges

Something that people in our area have not yet seen, but something that is needed in other ends of our country are wildlife bridges, or Ecoducts. These bridges, like the name suggests, are created for the use of animals to safely cross the road. The bridges are typically built on roads that have heavy traffic. These bridges are both beneficial to people, and animals. Animals aren't going to be hit by a passing vehicle, while people are not going to crash into crossing animals. A win win! Primarily it is deer that are the issue with crossing the streets, and deer are creatures of habit, like us. The deer will use the same paths for generations, so if a road is plopped onto their path, they will still cross it. These wildlife bridges will be placed on the animals usual trail or close to it, to encourage them to use a safe crossing point. This is something that I wish would be more prominent in our area.

This bridge is located in the Netherlands. Here you can see the trails from the animals that use it. 


The crossings may also be in the shape of an underpass. You can't have this adorable little family crossing a busy highway. 

Bridges have also been constructed for the red crab migration, which is awesome. Way to look out for the little guys!

Save these little angels. 


Sunday, December 6, 2015

Learning more about cats (kind of)

Not learning about real cats this time. More about an app that makes you feel like a cat hoarder.


I was told about an app called Neko Atsume (cat collector), where the goal is to document all the local cats in the neighborhood in a scrapbook. You can't interact with your cats, just lure them in with food and toys. The cats only stay for a little while and when they leave they will reward you with their form of money, fish, so you can buy them new toys.

This sounds like the dumbest game ever. I was skeptical. But for some reason this is strangely addicting. I'm not sure if its just the excitement of seeing a new cat in your yard, how it feels when you are trying to complete a Pokedex, how you're afraid to let your cats go hungry, or simply for the fact that these guys are adorable.

But there are a few things that we don't really understand fully in the game. For instance each cat has a personality, favorite toys, and a power level. As far as I can tell no one is really certain what a cats power level means, especially since they don't really do anything. A theory that is out there is that if a cat has a stronger power level and one with a lower is using its favorite toy, the stronger cat is able to kick the weaker out of the yard so that it is able to use it. But these cats look too precious to be doing anything such as this.

There are also some special cats that you are able to gain in your scrapbook, depending on the items that you purchase and place in your yard. The only special cats that I am aware of so far are the baseball player Joe DiMeowgio, the rough cowboy Billy the Kitten, and the Persian prince Xerxes IX.

The good news for you is that this app is free, and its available for both apple and android.

Happy hoarding.


Thursday, November 12, 2015

Blog logos, vector images.

We were assigned to make logos for our blogs. My blog has a pretty open theme, so I think I was able to be more open with my logo. We watched a PBS video on logos and I really enjoyed the simple logos. The super simple logos. I wasn't really a fan of the logos that were heavily detailed, or that had text in them. I made a logo with my blog title incorporated in it but it it my least favorite. I wanted to use minimal colors just for the fact of simplicity. I also wanted to use my cat because she has been involved within the blog a few times now, so I think she really fit. There was a symbol of a lightbulb available and I thought that worked best for learning things. The first attempt is definitely my favorite. The circle around the outside of the cat figure gives the whole image the look of a cats eye. The second image I am not really a fan of. I just don't like the text on the inside. But I felt like I needed to create a logo that had some type of text. I used Method Draw to make my logo, and it took my quite some time to figure out how to use the application. I honestly felt like I was using Microsoft Paint when I was using this. Maybe that means I was using it wrong... I don't know.

Thursday, October 29, 2015

Tagxedo

This was by far my least favorite application that we used. It looks simple to work with, but to add an image was complicated. I ran this off of chrome, which I had to switch over to Safari to use. I never use Safari simply for its lack of speed. I also had to download Silverlight, which I have never heard of. After doing that I still was not sure I was using this application correctly because I did not have the option of adding an image. Apparently I was using the application wrong, and after Googling how to run it I figured out how to add an image. I tried adding an image of one of my urban landscape photos, but without a precise outline of the shape it was nearly impossible to see the image within the tag cloud. I went into photoshop with my image and removed most of the background with the wand tool, in hopes of simply making a silhouette of the image.

Once I had the shape on there it was difficult figuring out how add more words to the tag cloud, I am surprized that I didn't give up on this. One of the most frustrating things was that the text would not take up my entire image. You can see here that my shape has much that is not filled up with text. I maximized my word count and was still not able to fill up the shape. This application took the most amount of time to finish and I am not happy with any of the results.

Here is my attempt. I like that it looks like its falling apart, kind of how this house looked anyways. 


Textorizer


For the first textorizer I used the same image I used for text-image, one of the photos from the urban landscape project. I like this image I took of this old crooked duplex so I tried to play around with it. It was a little awkward working with this application as it takes a while for the new image to load while you're working on it. It took me a few tries to get the image right, and it was hard to get the font to cover the entire image. It was a lot of waiting and being patient, a trait that I am laking. Maybe I am not choosing very interesting subject matter, but I am not too happy with this. But it was an interesting process at least. I think it is interesting in how scattered the words are, it almost makes the house is falling apart, which it might actually be soon.
textorizer 1
The next application we used was textorizer 2. I didn't really see a huge difference between the two, besides the fact that this application didn't have vertical text. The image I chose to use for this go-around was one that was just sitting on my phone that I took during my gallery practices course. It is Crystal, under a tarp, in the hallway joining the TMA to the CVA. It was a funny image, and I wanted to use it for something. I had more fun with this one, probably because of the image I had chosen. I think the outcome of this textorizer looks far better than the first go around. The words that I used for this was TMA, Sol Lewitt, Crystal, and ghost. 
textorizer 2 
Next we used Excoffizer, it creates a vector of the image of your photo using parallel lines, creating a wave-like texture. It is also National Cat Day, so i wanted to use a picture of my cat in here somehow. Nothing is more original than an edited cat photo right?? hahaha well nothing is more original than my cats eyes, which are crazy. they look something like this. (l   ). (   l) But honestly the first sample image I saw on the application made me think that this would be something fun to try. The image was wavy, and the more you messed with it the more the image seemed to move like an optical illusion. Out of all my images I have done, this is the one I am the most proud of. 
Allie, The Mighty Derp.

I had to make this huge to try to make you all appreciate this even more.
On a more serious note I did one of one of our urban landscape pictures as well. 
Its hard to see the original image in this, and when its larger it hurts your eyes to look at, and pain means its working, so I guess this works for me.


Using text-image and glass giant

Glass Giant attempt, photo of my WOOO button
We used the sites GlassGiant and Text-image for our assignment. GlassGiant has a function where it will convert any photo that you place into ASCII format. This format is making up the image with symbols and numbers. I was not too happy with the GlassGiant site, due to the pop ups. I would not use this site again just because I have a fear of computer viruses. I tried using a few different images on this site but I don't think they all turned out very well. The images that I used did not show up well, and I tried to change the contrast and remove much of the background on the images and I still didn't have much success with GlassGiant. Even when I changed the max width of a portrait image it seemed to not change the length of the image, so I was left with some oblong images, I cropped most of them so the oblong isn't noticeable. I tried using my images from our urban landscape but they would not go through the site.


For text-image I used some of our photos from the urban landscape. It was easier to make these images out on the HTML mode because of its use of color. I used one of my unedited photos for the HTML, and it turned out alright. Nothing really fantastic about it. I used the ASCII function with the same image, the first I used it with the default settings, the second time I inverted it and upped the contrast. I did the same with the matrix version of text-image, but with this I had to up the contrast in order to make out the image.


Text-image, HTML

Matrix, text-image. 
ASCII, text image, inverted and upped contrast
ASCII, text-image default

Thursday, October 22, 2015

Learning about generative art

For this assignment we were sent to three different websites to create. We were first sent to
Scribbler
Scribbler
Scribbler.com where the user is able to sketch a simple drawing onto a small "canvas" space, then we are able to watch as the image "scribbles" itself. In the scribble the lines of your drawing start to create small fibers which connect to the neighboring lines. The user is able to control the level of messiness of the connections as well as the color. I am not sure why but I chose to draw bunnies for
ScribblerToo
these assignments. It was difficult to draw these on the track pad of my computer but it was interesting to see the outcomes. I spent a great deal of time trying to figure out Scribbler that I sort of ran out of time to complete the ScribblerToo part of the assignment. I was
able to complete a sketch on this website but I was not able to put forth the effort that I would like to. On ScribblerToo the user is able to control the scribbles more easily by using them to sketch your object. They also have a feature where you are able to trace an image. I tried to trace one of my previous drawings from the original Scribbler site to make something with more volume. I ran out of time to complete the assignment, but I think I was able to show some level of volume to it. I think I liked the original Scribbler site as a whole better, just because the randomness of the image seemed more fun to me.
ScribblerToo
Flame
I tried uploading the image onto ScribblerToo but I was having issues with it. Once the image was on my canvas I was not able to remove it so I could just see my work. That was really frustrating to me.  I will probably revisit the site later. The last website we visited was Flame online, where the user is able to paint with a flame like tool. I tried doing multiple different images on this website but I was getting frustrated. It seems difficult to try to get anything representational on here, and I thought that the simple movements on the tool were very soothing. Flame was fun, and very zen.

Thursday, October 15, 2015

Learning about video mashups.


Mashup from Sara Orzo on Vimeo.
For this assignment we were to take video clips and mash them together to give them a new meaning. To get copyright free videos we used archive.org, or you could use your own videos. I opted to use the archive. There were a lot of videos available for anyone to use. The ones that I thought were most interesting were the old TV advertisements. A lot of them seemed awkward, and while putting them together with the awkward song I created for the last assignment I thought that worked out well. But for the overall assignment I wasn’t super pleased with my results. I have never tried to edit a video before, but it wasn't that difficult. I am using a Mac so I had to use iMovie for the assignment. iMovie was simple to use, the only things that really confused me at first was arranging the clips as well as figuring out how to save the finished movie. After a few youtube tutorials I figured it out though. 

I don't think that my video was very successful, probably because I didn't really know where I was going with these clips. I just started to find the awkward clips or just clips that I thought worked well with the clip before it and put them all together. Maybe the process would have been faster if I had a goal in mind for the whole mashup, maybe not. Either way this whole process took me a long time to finish, and I learned how to edit videos. I know how to edit them now, but not super well. I don’t know when I will have to edit a video again, but if I do I’m sure I’ll use iMovie again. And if I have to make another mashup I’ll but sure to look at more of the strange and old footage on archive.org

Saturday, October 3, 2015

Learning about the origins of a house cat

We all know that dogs were domesticated from wolves, but have you ever wondered where our cats came from? Well, I did at least. From a few different google searches I think I learned something about it.

Todays house cat, or domesticated cat, or felis silvestris catus, are all decedents of 5 different wildcat subspecies. These subspecies originated in Sardinia, Europe, central Asia, subsaharan Africa, and the Chinese desert.

These wildcats would start to hang around human settlements, just like our feral cats today, to catch mice. Humans don't like mice, therefore the cats were encouraged to stick around. When people started traveling from their native lands the cats followed (or were brought along, whatever). Genetic analysis shows that that our domestic house cats were derived from at least 5 founder cats that were in the Fertile Crescent, where humans had traveled for fertile land.

http://archaeology.about.com/od/domestications/qt/cat.htm

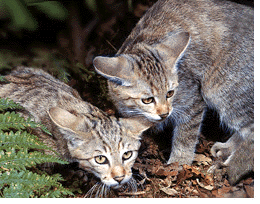
Here are the ancestors of your cat. 

Sicilian Wildcat
African Wildcat
European Wildcat


Chinese Desert Cat.
(There aren't too many pictures of these guys,
it was between this and one that looked scared shitless.)

Central Asian Wildcat
All of these wild kitties created my derp-eyed creature. Thanks, wildcats.


Thursday, October 1, 2015

Learning about Soundation


Doing this project took me back to when I was in first grade and my parents had me take piano lessons. I remember sitting at home in front of my keyboard in tears because I was not able to play it after hours of practicing. I was then forced again to try an instrument in middle school band which was required. I tried the trumpet, saxophone, clarinet, and was not able to play any of those. I had to settle for bass drum because that instrument only had one note and I could handle that.

This project was not fun for me. I am what I like to call musically challenged. I enjoy listening to music, but putting it together is not where my few skills in life lie. This is easier than actually trying to read and play music, but I still think you need to have some type of musical know-how to do this.

Soundation was pretty easy to use, I only had one issue on trying to save my file. The site has many different audio samples that are free to use. Simple drag the audio file onto the dashboard to add it to your song. Then you can save it to your profile and share it with the soundation community.

Overall I think I learned you need to have patience to make this type of music and keep trying different things to achieve the right sound. I tried, I don't think I succeeded, but thats okay, I still learned something.

Thursday, September 24, 2015

Learning about typologies and Pixlr.

For this adventure on Pixlr we upgraded from Pixlr express to the main Pixlr app. This app functions similar to Photoshop with some abilites cut out.

The entire process was simple enough, however it was incredibly tedious. To create the typology I chose to use a collection of old matchbooks from my now deceased grandparents. As far as I could tell they didn't smoke, but many of these matchbooks were collected in the time where smoking was more common and allowed in public spaces. After taking the images from my Iphone I adjusted their levels so the color of each matchbook was more vibrant. Then cropped the images so that they were all the exact same size, as well as to the ratio of 1:1. After doing that I opened a new blank image on Pixlr with the max size of 4000x4000 pixles, copy/pasted the images onto this new image, and placed them together. The very tedious part about this process was aligning the match books as uniform as possible. The issue with Pixlr compared to Photoshop is that there is no grid. To match these up I had to create a new image 100x100 pixels to use as a spacer. Even while using this I feel like my images are not as unifrom as I would like them to be, but after doing this for so long I gave up and headed over to Photoshop. I tried this same procress on photoshop, but my spacing was still a bit off on the edges (but with white on white it is hard to see). Overall I think this turned out alright, my background colors vary a little bit but I dont think it is very distracting, I kind of like the different colors in the wood.

Thursday, September 17, 2015

Learning about Animoto


Today I learned about how to use the Animoto application, which is a photo presenter, similar to smaller applications such as photogrid, and slide lab. Animoto has more themes than either of those applications, and allows you to edit different features that those apps do not. The only downside that this application has is that in order for your video to be free it has to be under 30 seconds long. Overall I would say this was pretty simple to use, it only took me about 10 minutes or so to finish the video. It didn't take very long to finalize either.

For my video I used some of my more successful images from my unedited and edited urban landscape album. I placed the unedited first, followed by my edited. I think this was a pretty good idea because it was difficult looking at other students edited and unedited albums side by side, this just made it easier for comparison. The song I used was from when we ripped the CD music. The only CD I had available at the time was Sufjan Stevens "Greetings from Michigan: The Great Lake State" which turned out to be pretty fitting, as the images I took were from Michigan. The song title is "For the Widows in Paradise, For the Fatherless in Ypsilanti".

Sunday, September 13, 2015

Learning more about things you think you don't like is a-okay.

Its funny how we say we don't like things that we really don't know that much about. Or maybe I am the only one who does this, but I doubt it. I have never been a huge fan of photography. It doesn't mean I dont appreciate the photography of others, I would just rather work with other mediums. When I use a camera, its usually to just take silly pictures of things I see out and about, and I don't see the purpose of editing the pictures. After editing some of the photos in this lesson I can see how editing helped a lot of my pictures look much better. 

The original image is of a pile of sticks, glass, bottle caps, and string that was in a driveway of a grain elevator. The bar is across the street to that may be the origin of the bottles. I took the picture with my iphone 6. According to Apple the camera has 8 megapixels. The top picture, which is the origninal, is 2,448 x 3,264 pixels. By multiplying this we get this massive number of 7,990,272 pixels. This number is the image resolution which we round up to make it simpler to 8 megapixels.

I really like all the texture that is visible in the original image, and while editing I wanted to make the texture more visible. For editing we used Pixlr express. The application was simple to use and free. The first thing that I did when editing all my photos was rotate, and adjust using AutoFix. The autofix seemed to adjust the saturation and contrast in a lot of my pictures, sometimes it would do too much, but most of the time the autofix started the editing out pretty nicely. The original image was pretty dull, so to give it some color I raised the vibrancy quite a bit. By doing this it brought out the richness of the soil and the rust of the bottle caps. There was still some other colors in the image that I thought would look interesting to bring more foreward, so I adjusted the color. This consisted of changing the hue, which I went down to a more blue hue, and raising the saturation. While doing this I think it enhanced and altered the glass color to a greenish hue, which showed the reflection of light more. The only thing I am really unsure if I like in this edit is the color of the string switching to the blue hue. If I could change one thing about Pixlr it would be that I could isolate an area in which I did not wish to edit. Overall I don't think that the blue string isn't really that distracting, I'm just being a bit nit-picky.

Sunday, August 30, 2015

Last Meals.

We have all had those days where we go onto Youtube to find a certain video, but end up clicking a realted video, followed by another realted video, until we end up on watching videos that are completely unrealated. Today I watched a video on American children eating school lunches from around the world. The results of that was cute and hilarious, but somewhere down the related video suggestion I got to videos about prisoners on death row and their final meal requests.

Some of these inmates did not request much food at all, many others requested feasts. One Texas inmate requested such a large meal that Texas no longer offers last meal options on their death row. This man, Lawrence Russel Brewer, basically ruined the aility to choose your last meal for everyone on death row in Texas. 

Brewers meal consisted of three fajitas, two chicken fried steaks with gravy and onions, a tripple-meat bacon cheeseburger, fried okra, a pound of barbecue, a full meat-lovers pizza, a pint of ice cream, and a slab of peanut butter fudge. This meal was about 3500 calories. Brewer ruined this meal by not taking a single bite. Brewer did not eat his feast, Texas got mad, banned last meals for all death row inmates in Texas. There have been far larger meals that Texas inmates on death row have been provided, but Brewers was the last.

Here are some other last meal requests that I found

Thomas J Grasso: Upon a long list of food with a calorie count similar to Brewer, Grasso also requested a can on room temperature SpaghettiOs. However this final part of his meal was not granted, as the kitchen apparantly gave him spaghetti instead. His final words were "I did not get my SpaghettiOs, I got spaghetti. I want the press to know this."

Gerald Lee Mitchell: A bag of assorted Jolly Ranchers.

James Edward Smith: Dirt. The dirt represented part of a voodoo ritual, where it would help Smith move to the afterlife. However his request was denied, therefore he settled for a cup of yogurt. I don't see why dirt would be a hard request to grant or why you would simply settle for yogurt. But all this talking about dirt and yogurt is making me think of a that worms and dirt pudding cups with the gummy worms.

If you didnt see your meal of choice, or were interested in looking at some more, here is a list of some more strange ones.

I don't plan on being on death row, or being in prison. But if I am able to know when I am going to die, and am able to choose a final meal with no limitations, it would consist of two over medium eggs, thick cut bacon, banana-nut pancakes, fried apples, a cup of coffee with Irish cream, a mimosa, and topped off with creme brulee with blueberries and strawberries. Or you could just take me to Cracker Barrel and I'll be ready to move on with a full and conent belly.